Maintaining your mountain bike’s hydraulic disc brakes is essential for optimal performance and safety on the trails. One critical aspect of bike maintenance is regularly bleeding your bike brakes to ensure they remain responsive and powerful. In this comprehensive guide, we’ll walk you through the process of MTB brake bleeding, providing tips and tricks to help you keep your brakes in top condition.
Introduction to Bleeding Bike Brakes
Why Bleeding Bike Brakes is Important
Bleeding bike brakes is a crucial maintenance task for any mountain biker using hydraulic disc brakes. Over time, air bubbles can enter the brake system, leading to a spongy feel and reduced braking performance. By performing a brake fluid replacement, you can restore your brakes’ responsiveness and prevent issues like fading or complete failure on the trail.
Regular brake bleeding also helps to extend the lifespan of your braking system components. Old, contaminated fluid can cause corrosion and wear on internal parts, leading to costly repairs or replacements down the line. By keeping your fluid fresh and free of air bubbles, you can ensure your brakes remain reliable and powerful for many rides to come.
When to Bleed Your Bike Brakes
Knowing when to bleed your bike brakes is key to staying on top of your bike maintenance. As a general rule, it’s a good idea to bleed your hydraulic disc brakes at least once a year, or more frequently if you ride in wet or muddy conditions.
Some signs that it’s time for a brake bleed include:
- A spongy or soft feel when pulling the brake lever
- Reduced braking power or responsiveness
- Leaking fluid around the caliper or lever
- Visible air bubbles in the fluid reservoir
If you experience any of these symptoms, it’s time to break out the bleed kit and give your brakes some TLC.
Tools and Materials Needed
Essential Tools for Bleeding Bike Brakes
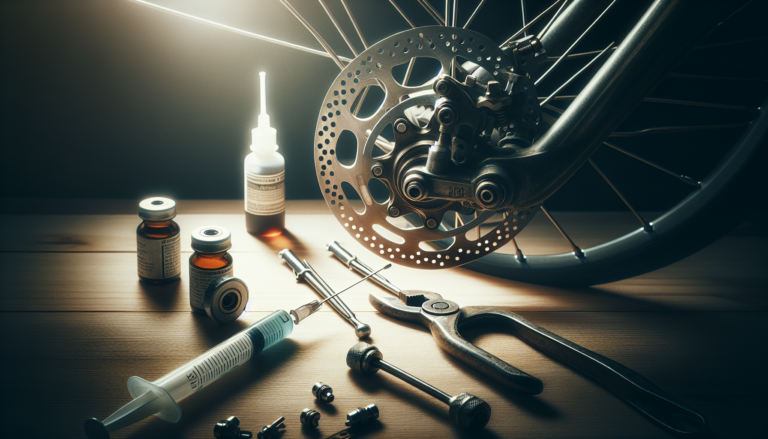
To properly bleed your hydraulic disc brakes, you’ll need a few essential tools and materials. Most importantly, you’ll need a bleed kit specific to your brake brand and model. These kits typically include:
- Syringes for injecting and removing fluid
- Tubing to connect the syringes to the bleed ports
- Bleed blocks to keep the pistons in place during bleeding
- Brake fluid or mineral oil, depending on your brake type
In addition to the bleed kit, some helpful maintenance tools include:
- Clean rags or paper towels
- Isopropyl alcohol for cleaning
- Safety glasses and nitrile gloves
- Torx or hex wrenches for removing the reservoir cover
Having these tools on hand will make the bleeding process much smoother and more efficient.
Types of Brake Fluids
When it comes to brake fluid for bleeding bike brakes, there are two main types: mineral oil and DOT fluid. It’s crucial to use the correct type specified by your brake manufacturer, as using the wrong fluid can cause damage to seals and other components.
Mineral oil is commonly used by Shimano and Magura, while SRAM and other brands typically use DOT fluid. DOT fluid is further categorized into different grades, such as DOT 3, DOT 4, and DOT 5.1, each with slightly different properties. Always consult your brake manufacturer’s guidelines to ensure you’re using the proper fluid for your system.
Step-by-Step Guide to Bleeding Bike Brakes
Preparation and Safety Precautions
Before diving into the bleeding process, it’s important to take some safety precautions and prepare your workspace. Brake fluid can be harmful to your skin and eyes, so always wear safety glasses and nitrile gloves when working with it. It’s also a good idea to lay down some cardboard or newspapers to protect your work surface from spills.
Start by removing your wheels and securing your bike in a work stand, if you have one. If not, you can simply flip your bike upside down and rest it on the saddle and handlebars. Make sure your bike is stable and won’t tip over during the process.
Next, remove the brake pads from your calipers and insert the appropriate bleed block from your bleed kit. This will prevent the pistons from overextending and popping out during bleeding. If you don’t have a bleed block, you can use a clean plastic tire lever or a piece of cardboard cut to size.
Removing the Old Brake Fluid
With your bike prepped and ready, it’s time to start removing the old brake fluid. Begin by attaching a syringe filled with fresh fluid to the bleed port on your brake lever. Slowly depress the plunger to push fluid into the system, watching for air bubbles to rise into the syringe.
At the caliper end, attach an empty syringe to the bleed port and gently pull on the plunger to draw out the old fluid. You may need to alternate between pushing and pulling the syringes a few times to get all of the old fluid out. Continue this process until the fluid coming out of the caliper is clean and bubble-free.
Refilling with New Brake Fluid
Once you’ve removed all of the old fluid, it’s time to refill the system with fresh brake fluid. Start by filling your clean syringe with new fluid and attaching it to the caliper bleed port. Slowly depress the plunger to push fluid up through the brake line and into the lever reservoir.
As you push fluid in, keep an eye on the lever reservoir and top it off as needed to maintain the proper fluid level. Continue pushing fluid until it starts coming out of the lever bleed port, then attach your other syringe to catch the excess.
Checking for Air Bubbles
With fresh fluid in the system, it’s important to check for any remaining air bubbles that could affect your brake performance. Gently tap and flick the brake hose and components to encourage any bubbles to rise to the top of the system.
If you see bubbles appearing in the lever syringe, carefully pull them into the syringe and then push the fluid back into the system. Repeat this process a few times until no more bubbles appear. You may need to alternate bleeding from the caliper and lever ends to fully purge any air from the lines.
Final Adjustments and Testing
Once you’re satisfied that the system is bubble-free, it’s time to make some final adjustments and test your handiwork. Start by closing off the bleed ports and removing the syringes, being careful not to spill any fluid. Clean up any residual fluid with isopropyl alcohol and replace your brake pads.
Pump the brake lever a few times to make sure it feels firm and responsive. If it still feels spongy, you may need to repeat the bleeding process to remove any stubborn air bubbles. Once the lever feels good, reinstall your wheels and take your bike for a short test ride around the block, gradually applying the brakes to ensure they’re working properly.
Tips for Maintaining Your Bike Brakes
Regular Maintenance Schedule
To keep your bike brakes in top condition, it’s important to stick to a regular maintenance schedule. In addition to annual bleeding, there are a few other tasks you should perform to extend the life of your brakes:
- Check your brake pads for wear and replace them when they reach the wear indicator line
- Clean your rotors and pads with isopropyl alcohol to remove any oil or contaminants
- Inspect your brake hoses for any kinks, cracks, or leaks, and replace them if necessary
- Check your brake fluid level monthly and top it off if it’s low
By staying on top of these simple maintenance tasks, you can ensure your brakes are always ready to perform when you need them most.
Common Issues and Troubleshooting
Even with regular maintenance, you may occasionally run into issues with your hydraulic disc brakes. Here are a few common problems and how to troubleshoot them:
| Problem | Possible Causes | Solution |
|---|---|---|
| Spongy or soft brake lever feel | Air in the brake lines, worn brake pads, contaminated fluid | Bleed the brakes, replace the pads, or flush the fluid |
| Squealing or howling noise when braking | Contaminated pads or rotors, misaligned calipers | Clean the pads and rotors with alcohol, realign the calipers |
| Leaking fluid | Damaged brake hose, worn seals, loose fittings | Replace the hose, rebuild the levers or calipers, tighten fittings |
If you’re unsure how to diagnose or fix a problem with your brakes, don’t hesitate to take your bike to a professional mechanic. They can help identify the issue and get your brakes back in working order.
Conclusion
Bleeding your bike brakes may seem like a daunting task at first, but with the right tools and a bit of patience, it’s a skill that any mountain biker can master. By regularly maintaining your hydraulic disc brakes, you can ensure they provide the stopping power and control you need to tackle any trail with confidence.
Remember to always wear safety gear when working with brake fluid, and take your time to ensure a thorough bleed. With practice, you’ll be able to keep your brakes in top shape and spend more time enjoying the ride.


