Introduction to Replacing Bike Chain
Replacing a bike chain is an essential maintenance task that every cyclist should know how to do. Over time, bike chains wear out and stretch, leading to poor shifting performance and increased wear on other drivetrain components like the cassette and chainrings. By regularly replacing your bike chain, you can keep your bike running smoothly and extend the life of your drivetrain.
Why Replacing Bike Chain is Important
Your bike chain is a consumable part that wears down with use. As it stretches and the pins and plates wear, it no longer meshes properly with the teeth on your cassette and chainrings. This can cause skipping, poor shifting, and accelerated wear on these more expensive components. Regularly replacing your bike chain is a cost-effective way to maintain your drivetrain and avoid premature wear.
Moreover, a worn chain is less efficient at transferring power from your pedals to the rear wheel. You may notice that your pedaling feels less crisp and responsive as your chain wears out. Replacing the chain restores that new-bike feeling and ensures you’re getting the most out of your pedaling effort.
When to Replace Your Bike Chain
Most mechanics recommend replacing your chain every 750 to 1,000 miles, depending on your riding conditions. If you frequently ride in wet, muddy, or dusty conditions, you may need to replace your chain more often. The same goes if you tend to push big gears and put a lot of strain on your drivetrain.
You can check your chain for wear using a chain wear indicator tool. These inexpensive tools measure your chain’s elongation and tell you when it’s time for a replacement. Many chain wear tools have 0.5% and 0.75% indicators. If your chain is at or beyond the 0.5% mark, it’s time to replace it. Pushing it to 0.75% will accelerate the wear on your cassette and chainrings.
Tools Needed for Replacing Bike Chain
Essential Tools for Bike Chain Replacement
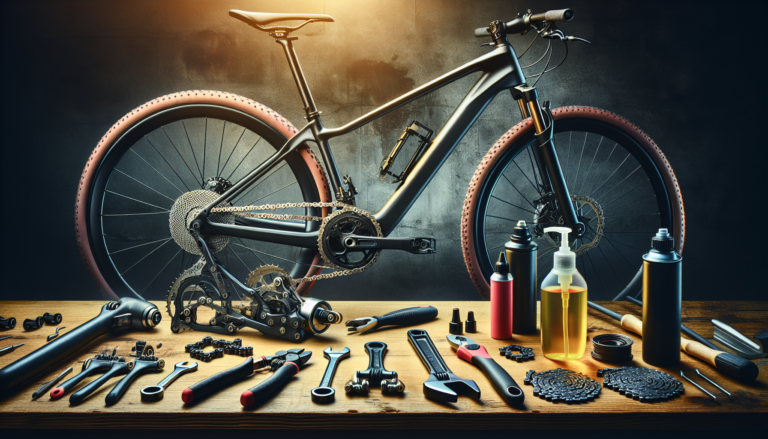
To replace your bike chain, you’ll need a few essential tools:
- Chain tool (also called a chain breaker) – This tool pushes out the pins that hold your chain together, allowing you to break the old chain and size the new one.
- New chain – Make sure to get a chain that is compatible with your bike’s drivetrain. Chains come in different speeds (e.g., 9-speed, 10-speed, 11-speed) and have different widths. Consult your bike’s specs or ask your local bike shop for help selecting the right chain.
- Master link pliers (optional) – Some chains use master links to connect the two ends. Master link pliers make it easier to disconnect and reconnect these links without damaging the chain.
Optional Tools for Easier Replacement
While not strictly necessary, a few additional tools can make the chain replacement process easier:
- Workstand – A bike workstand holds your bike at a comfortable height and allows you to rotate the pedals and wheels freely while you work.
- Gloves – Chains can be greasy. Wearing gloves keeps your hands clean and provides a better grip on the chain and tools.
- Rag – Use a rag to wipe down the new chain before installation, removing any excess factory grease.
Step-by-Step Guide to Replacing Bike Chain
Step 1: Check Chain Wear
Before removing your old chain, it’s good practice to check it for wear using a chain wear indicator tool. This will confirm that replacement is necessary and give you a baseline for comparison with the new chain. If the tool indicates 0.5% wear or more, proceed with the replacement.
Step 2: Remove the Old Chain
Shift your chain onto the smallest cog on your rear cassette and the smallest chainring on your crank. This will give you the most slack to work with. If your chain has a master link, locate it and disconnect it using your hands or master link pliers. If not, use the chain tool to drive out one of the pins, separating the chain into two pieces.
Now, gently pull the chain off your drivetrain, threading it through the rear derailleur. If the chain seems stuck, check for any tight links and make sure you’ve disengaged the pin completely. Be careful not to bend or kink the chain as you remove it, as this can damage it and make it unsafe to reuse.
Step 3: Size the New Chain
There are several methods for sizing a new chain. The simplest is to lay your old chain next to the new one, aligning the two ends, and cutting the new chain to the same length. This method works well if your old chain was sized correctly and you’re replacing it before it’s too worn.
Another method is to thread the new chain onto your large chainring and largest cassette cog, bypassing the rear derailleur. Pull the chain ends together, ensuring that the rear derailleur is at its maximum extension, then add one or two more links. This gives you a little room for adjustment while preventing the chain from being too loose. Mark the link where you’ll need to break the chain.
Step 4: Route the New Chain
Starting at the rear cassette, thread the new chain through the rear derailleur cage, following the same path as the old chain. Make sure the chain is engaging with the teeth on the cassette and that the upper jockey wheel is between the chain’s inner and outer plates.
Next, route the chain onto the smallest chainring, threading it through the front derailleur cage. Again, ensure the chain is seated properly on the chainring teeth. Pull the two ends of the chain together until they meet, ensuring there’s no slack.
Step 5: Connect the Chain
If your chain uses a master link, insert the link into the two open ends of the chain. You should hear a click as the link engages. If needed, use master link pliers to snap the link into place fully.
For chains without a master link, line up the inner and outer chain plates, then insert a connecting rivet through the holes. Using the chain tool, press the rivet into place, leaving just a small amount exposed. Be careful not to push the rivet too far, as this can weaken the link and cause the chain to break. Most chain tools have a stop that prevents you from over-pressing the rivet.
Final Checks and Maintenance Tips
Running Through Gears
After installing the new chain, it’s crucial to run through all the gears to ensure everything is working smoothly. Shift the chain up and down the cassette, and from the small to large chainrings. The chain should move smoothly and without hesitation. If you experience any skipping or rough shifting, the chain may be too long or too short. Make adjustments as needed.
Lubricating the New Chain
Before taking your bike out for a spin, apply a high-quality bike chain lubricant to the new chain. This will help reduce friction, prevent rust, and extend the life of your chain. Wipe off any excess lube with a rag, as too much can attract dirt and grime. Regularly clean and lubricate your chain to keep it running smoothly and efficiently.
Common Mistakes to Avoid
Incorrect Chain Sizing
One of the most common mistakes when replacing a bike chain is cutting it too short or leaving it too long. A chain that’s too short can cause damage to your drivetrain, while a chain that’s too long can cause poor shifting and may fall off the chainrings. Always double-check your chain length before cutting, and err on the side of slightly too long rather than too short.
Improper Chain Routing
Another common mistake is routing the chain incorrectly through the rear derailleur or front derailleur cage. This can cause the chain to rub, skip, or even get stuck. Make sure to follow the path of the old chain carefully, or consult your bike’s user manual for guidance.
Neglecting Lubrication
Forgetting to lubricate a new chain is a surefire way to shorten its lifespan. New chains come with a factory coating to prevent rust during shipping, but this coating is not a substitute for proper lubrication. Always apply a high-quality bike chain lube before riding, and reapply as needed based on your riding conditions.
Additional Resources
Instructional Videos
If you’re more of a visual learner, there are plenty of great instructional videos online that can walk you through the process of replacing a bike chain. Park Tool, one of the leading manufacturers of bike tools and repair stands, has an excellent video tutorial that covers all the steps in detail.
Related Articles
For more information on bike chain maintenance and drivetrain care, check out these helpful articles:


