Removing bike pedals is an essential skill for any cyclist, whether you’re a casual rider or a dedicated enthusiast. Whether you need to replace worn-out pedals, pack your bike for travel, or perform routine maintenance, knowing how to properly remove and reinstall your pedals is crucial. In this comprehensive guide, we’ll walk you through the process step by step, providing tips and solutions to common issues along the way.
Introduction to Bike Pedal Removal
Bicycle pedals are a crucial component of your bike, serving as the primary point of contact between you and your machine. Over time, pedals can wear out, become damaged, or simply need to be replaced to suit your riding style or preferences. Learning how to remove bike pedals is a fundamental skill that every cyclist should master.
Why You Might Need to Remove Bike Pedals
There are several reasons why you might need to remove your bicycle pedals:
- Replacement: If your pedals are worn out, damaged, or no longer suit your needs, you’ll need to remove them to install new ones.
- Maintenance: Regularly removing and cleaning your pedals can help extend their lifespan and ensure optimal performance.
- Travel: If you’re planning to pack your bike for travel, removing the pedals can help save space and protect them from damage.
Types of Bike Pedals
Before we dive into the pedal removal process, it’s important to understand the different types of pedals you might encounter:
- Flat Pedals: These are the most common type of pedals, featuring a flat surface with pins or grippy materials to keep your feet in place.
- Clipless Pedals: Despite their name, clipless pedals actually involve clipping your shoes into the pedals using a special cleat system. These pedals offer a more secure and efficient connection between your feet and the bike.
Tools Required for Removing Bike Pedals
To successfully remove your bike pedals, you’ll need the following tools:
- 15mm pedal wrench or an 8mm hex wrench (depending on your pedal type)
- Grease (for reinstallation)
15mm Pedal Wrench
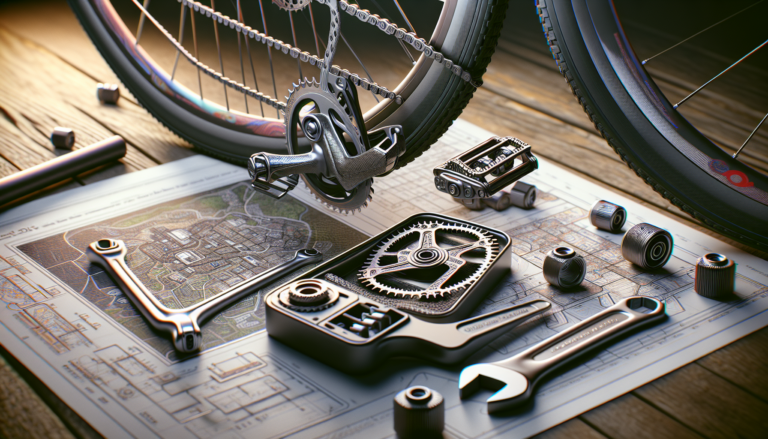
A 15mm pedal wrench is a thin, flat tool specifically designed for removing and installing pedals. Its narrow profile allows it to fit into the tight spaces between the pedal and the crank arm. Most flat pedals and some clipless pedals require a 15mm pedal wrench for removal.
8mm Hex Wrench
Some clipless pedals, particularly those designed for mountain biking, use an 8mm hex wrench (Allen key) for removal and installation. If your pedals have a hexagonal socket at the end of the spindle, an 8mm hex wrench is the tool you’ll need.
Step-by-Step Guide to Removing Bike Pedals
Now that you have your tools ready, let’s walk through the process of removing your bike pedals.
Step 1: Positioning the Bike
Start by positioning your bike so that you can easily access the pedals. If you have a repair stand, use it to secure your bike at a comfortable working height. If not, you can lean your bike against a wall or flip it upside down, resting it on the seat and handlebars.
Step 2: Identifying the Right and Left Pedals
It’s crucial to note that the right and left pedals are threaded differently to prevent them from loosening while riding. The right pedal has a regular right-hand thread (righty-tighty, lefty-loosey), while the left pedal has a reverse thread (lefty-tighty, righty-loosey). Make sure to identify which pedal you’re working on before proceeding.
Step 3: Using the Correct Tool
Depending on your pedal type, use either a 15mm pedal wrench or an 8mm hex wrench. Position the wrench on the flats of the pedal spindle, making sure it’s fully engaged to prevent stripping the threads.
Step 4: Loosening the Pedals
For the right pedal, turn the wrench counterclockwise to loosen it. For the left pedal, turn the wrench clockwise. If the pedals are particularly tight or stuck, you may need to apply some extra force. Use your body weight to push down on the wrench, but be careful not to damage the threads or lose your balance.
Step 5: Removing the Pedals
Once you’ve loosened the pedals, continue turning the wrench until the pedals come off completely. If the pedals are still difficult to remove by hand, you can use the wrench to finish the job. Set the pedals aside, keeping track of which is the right and which is the left.
Common Issues and Solutions
Even with the right tools and technique, you may encounter some challenges when removing your bike pedals. Here are a few common issues and how to address them.
Dealing with Stuck Pedals
If your pedals are stuck and won’t budge, don’t force them. Applying too much force can damage the threads or even break the pedal spindle. Instead, try these techniques:
- Penetrating Oil: Apply a penetrating oil, like WD-40 or PB B’laster, to the pedal threads and let it sit for a few minutes. This can help loosen any rust or grime that may be causing the pedal to stick.
- Heat: Carefully apply heat to the pedal spindle using a heat gun or blow dryer. The heat can cause the metal to expand slightly, breaking the bond between the pedal and the crank arm. Be cautious not to overheat the components or damage any plastic parts.
- Leverage: Try using a longer wrench or cheater bar to increase your leverage. Just be sure not to apply so much force that you damage the pedal or crank arm.
Avoiding Cross-Threading
When reinstalling your pedals, be careful not to cross-thread them. Cross-threading occurs when the pedal is threaded into the crank arm at an angle, damaging the threads and making it difficult or impossible to remove the pedal later. To avoid cross-threading:
- Start threading the pedal by hand, ensuring it goes in smoothly and straight.
- If you feel resistance or the pedal seems to be going in at an angle, stop and start over.
- Only use a wrench once the pedal is threaded most of the way in by hand.
Tips for Reinstalling Bike Pedals
Once you’ve successfully removed your pedals, you’ll eventually need to reinstall them or install new ones. Here are a few tips to ensure a smooth and secure installation.
Greasing the Threads
Before reinstalling your pedals, apply a small amount of grease to the threads. This will help prevent seizing and make future removal much easier. Be sure to use a grease specifically designed for bike components, as other types of grease may degrade certain materials.
Proper Torque and Tightening
When tightening your pedals, be sure to use the proper torque. Over-tightening can damage the threads or cause the pedal to seize, while under-tightening can result in the pedal coming loose while riding. Most pedal manufacturers specify a recommended torque value, usually around 25-30 Nm. If you don’t have a torque wrench, aim for a snug fit without applying excessive force.
Conclusion
Removing bike pedals is a straightforward process that every cyclist should learn. By following the steps outlined in this guide and using the proper tools, you can easily remove your pedals for maintenance, replacement, or travel.
Summary of Steps
- Position your bike and identify the right and left pedals.
- Use a 15mm pedal wrench or 8mm hex wrench, depending on your pedal type.
- Loosen the right pedal by turning counterclockwise, and the left pedal by turning clockwise.
- Remove the pedals by hand or with the wrench.
- When reinstalling, grease the threads and tighten to the proper torque.
Additional Resources
If you’re interested in learning more about bicycle maintenance or need help with a specific issue, there are plenty of resources available:
- Park Tool: Park Tool’s website offers a wealth of information on bike repair and maintenance, including detailed tutorials and videos.
- Global Cycling Network: GCN’s YouTube channel features a variety of informative and entertaining videos on cycling, including maintenance tips and tutorials.
- r/bikewrench: This Reddit community is a great place to ask questions, share knowledge, and connect with other cyclists passionate about bike maintenance and repair.
By mastering the skill of removing and installing bike pedals, you’ll be well-equipped to handle a variety of maintenance tasks and keep your bike in top shape for all your cycling adventures.


