Introduction to Patching a Bike Tube
Knowing how to patch a bike tube is an essential skill for every cyclist. Whether you’re a casual rider or a serious enthusiast, being able to fix a flat tire can save you time, money, and frustration. With the right tools and techniques, patching a bike tube is a quick and easy process that anyone can learn.
In this comprehensive guide, we’ll walk you through the step-by-step process of bike tube repair, from identifying the puncture to applying the patch and getting back on the road. We’ll also cover the essential tools and materials you’ll need, as well as tips for avoiding common mistakes and ensuring long-lasting repairs.
Why It’s Important to Fix a Flat Tire
Fixing a flat tire is a crucial part of bicycle maintenance. A flat tire can leave you stranded on the side of the road, disrupt your ride, and even damage your rims if you continue to ride on it. Learning how to patch a bike tube allows you to quickly address the issue and get back to your ride with minimal downtime.
Moreover, being self-sufficient in bike repairs can save you money in the long run. Instead of having to replace your tube every time you get a flat, you can simply patch it up and continue using it. This not only reduces waste but also ensures that you’re always prepared for unexpected punctures.
Common Causes of Bike Tube Punctures
Bike tube punctures can happen for a variety of reasons. Some of the most common causes include:
- Sharp objects on the road, such as glass, thorns, or nails
- Pinch flats caused by hitting a curb or pothole
- Worn-out or damaged tires that allow debris to penetrate the tube
- Improperly seated tubes that get pinched between the tire and rim
Understanding these common causes can help you avoid punctures in the future by being more aware of road hazards and maintaining your tires properly. However, even with the best precautions, flats can still happen, which is why knowing how to patch a tube is so important.
Essential Tools and Materials for Patching a Bike Tube
Before you can start repairing a puncture, you’ll need to gather the necessary tools and materials. Here’s what you’ll need to include in your bike repair kit:
Overview of a Bike Repair Kit
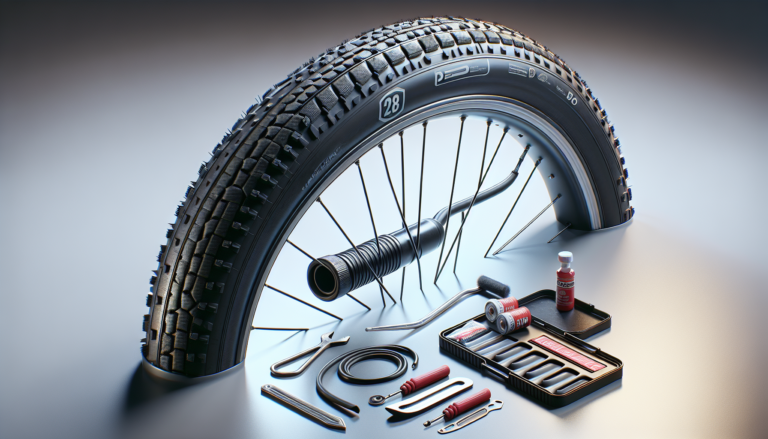
A basic bike repair kit, also known as a patch kit, should include the following items:
- Tire levers for removing the tire from the rim
- Sandpaper or a scraper for roughing up the tube surface
- Glue or vulcanizing fluid for applying patches
- Patches in various sizes
- A small piece of chalk for marking the puncture location
You can purchase pre-assembled bike repair kits or assemble your own with individual components. Make sure to choose high-quality patches and glue for the best results.
Additional Tools You Might Need
In addition to the basic repair kit, there are a few other tools that can make the patching process easier and more effective:
- Tire levers for removing the tire from the rim (if not included in your repair kit)
- Sandpaper for roughing up the tube surface around the puncture
- A pump for re-inflating the tube after patching
- A basin or bucket for holding water to check for leaks
While not essential, these additional tools can streamline the patching process and help you achieve a more reliable repair.
Step-by-Step Guide to Patching a Bike Tube
Now that you have your tools and materials ready, it’s time to start patching your bike tube. Follow these bike tube patching instructions for a step-by-step guide:
Step 1: Remove the Bike Tube
The first step in bike tube repair is to remove the tube from the tire. Use tire levers to carefully pry one side of the tire off the rim, then remove the tube from inside the tire. If you’re unsure which tire lever to use, refer to our guide on the best tire levers for easy and damage-free removal.
Once the tube is out, inspect the tire for any debris or sharp objects that may have caused the puncture. Remove anything you find to prevent future flats.
Step 2: Locate the Leak
Next, you’ll need to locate the source of the leak. The easiest way to do this is to inflate the tube and listen for the hiss of escaping air. You can also submerge the tube in water and look for bubbles, which will indicate the location of the leak.
If you’re having trouble detecting leaks, try inflating the tube to a higher pressure and re-submerging it. You can also try running your hand along the tube to feel for escaping air.
Step 3: Prepare the Area
Once you’ve found the leak, it’s time to prepare the area for patching. Use sandpaper or a scraper to rough up the surface of the tube around the puncture. This will help the patch adhere better and create a stronger seal.
Make sure to clean the area thoroughly, removing any dirt, debris, or loose rubber. The cleaner the surface, the better the patch will hold.
Step 4: Apply the Patch
Now it’s time to apply the patch. If you’re using a glueless patch, simply peel off the backing and press the patch firmly over the puncture.
If you’re using a vulcanizing patch, apply a thin layer of glue to the tube and allow it to dry until tacky. Then, press the patch onto the glue and hold it in place for a few seconds to ensure a good bond.
Regardless of the type of patch you’re using, make sure to apply firm, even pressure to the entire surface of the patch. This will help create a strong, airtight seal.
Step 5: Test the Patch
Before reinstalling the tube, it’s important to check the patch to make sure it’s holding. Inflate the tube and test it underwater again, looking for any signs of bubbles or leaks.
If the patch is holding, deflate the tube and reinstall it in the tire. If you notice any leaks, you may need to apply a second patch or start the process over with a new tube.
Types of Patches: Glueless vs. Vulcanizing
When it comes to bike tube repair, there are two main types of patches: glueless and vulcanizing. Each has its own advantages and disadvantages, so it’s important to choose the right type for your needs.
Advantages and Disadvantages of Glueless Patches
Glueless patches are a popular choice for many cyclists due to their quick application and ease of use. These patches come with a pre-applied adhesive that allows you to simply peel and stick them onto the tube.
However, glueless patches may not provide as strong or long-lasting of a seal as vulcanizing patches. They can also be more prone to peeling or coming loose over time, especially if the tube isn’t thoroughly cleaned before application.
Advantages and Disadvantages of Vulcanizing Patches
Vulcanizing patches, on the other hand, require the use of a special vulcanizing fluid or glue. This creates a chemical bond between the patch and the tube, resulting in a stronger and more permanent repair.
The downside of vulcanizing patches is that they can be more time-consuming and messy to apply. The glue also needs to dry before the patch can be applied, which can add a few minutes to the repair process.
Ultimately, the choice between glueless and vulcanizing patches comes down to personal preference and the specific needs of your repair. Many cyclists carry both types of patches in their repair kits to be prepared for any situation.
Tips for Effective Bike Tube Repairs
To ensure that your bike tube repairs are as effective and long-lasting as possible, keep these tips in mind:
Common Mistakes to Avoid
Some of the most common mistakes when patching a bike tube include:
- Not cleaning the tube thoroughly before applying the patch
- Using old or dried-out glue
- Not allowing the glue to dry completely before applying the patch
- Not pressing the patch down firmly enough
- Not checking the patch for leaks before reinstalling the tube
By avoiding these common mistakes, you can increase the chances of a successful repair and reduce the risk of future flats.
Best Practices for Long-Lasting Repairs
To ensure that your bike tube repairs last as long as possible, follow these best practices:
- Always use high-quality patches and glue
- Take your time and don’t rush the repair process
- Make sure the tube is completely clean and dry before applying the patch
- Apply firm, even pressure to the patch for at least 30 seconds
- Allow the glue to dry completely before inflating the tube
- Check the patch for leaks before reinstalling the tube
- Carry spare tubes and a repair kit with you on all rides
By following these best practices, you can ensure that your bike tube repairs are effective, reliable, and long-lasting.
Conclusion: Keeping Your Bike in Top Shape
Learning how to patch a bike tube is an essential skill for any cyclist. By understanding the basics of bicycle maintenance and bike tube repair, you can keep your bike in top shape and avoid unnecessary downtime and expenses.
Regular Maintenance Tips
In addition to knowing how to fix a flat, there are several other bicycle maintenance tasks that every cyclist should perform regularly:
- Check tire pressure before every ride
- Clean and lubricate the chain, gears, and other moving parts
- Inspect the tires for wear, damage, or embedded debris
- Test the brakes and make sure they’re functioning properly
- Keep your bike repair kit stocked and easily accessible
By performing these regular maintenance tasks, you can extend the life of your bike and ensure that it’s always ready to ride.
When to Replace Your Bike Tube
While bike tube repairs can be effective, there are times when it’s better to simply replace the tube instead. If you notice any of the following signs, it may be time for a new tube:
- Multiple patches on the same tube
- Large holes or tears that are difficult to patch
- Thin or worn-out areas that are prone to punctures
- Patches that consistently fail or leak
By replacing your bike tube when necessary, you can ensure that your rides are safe, reliable, and enjoyable.
With this comprehensive guide to patching a bike tube, you now have the knowledge and skills needed to tackle this essential bike maintenance task with confidence. Remember to always carry a repair kit and spare tubes on your rides, and don’t hesitate to patch or replace your tube as needed to keep your bike in top shape.


