Wrapping bike handlebars is an essential skill for any cyclist, whether you’re a seasoned pro or just starting out. A well-wrapped handlebar not only enhances the look of your bike but also provides a comfortable and secure grip, which is crucial for long rides and challenging terrains. In this comprehensive guide, we’ll walk you through the process of wrapping your bike handlebars, from choosing the right materials to mastering the techniques for a flawless finish.
Introduction to Wrapping Bike Handlebars
Why Wrapping Bike Handlebars is Important
Wrapping your bike handlebars is more than just a cosmetic upgrade. Handlebar tape serves several important functions, including:
- Providing a comfortable and secure grip, especially during long rides or in wet conditions
- Reducing vibrations and road buzz, which can cause hand fatigue and numbness
- Protecting the handlebars from damage caused by sweat, dirt, and wear
- Customizing the look of your bike to match your personal style
By learning how to properly wrap your handlebars, you’ll not only improve your cycling experience but also extend the life of your bike.
Types of Bikes and Handlebar Tape
Different types of bikes require specific handlebar tape materials and wrapping techniques. The most common types of bikes that benefit from handlebar wrapping include:
- Road bikes: These bikes typically feature drop handlebars and require thin, lightweight tape that provides a secure grip without adding bulk.
- Gravel bikes: Designed for mixed-terrain riding, gravel bikes often use thicker, cushioned tape to absorb vibrations and provide extra comfort on rough roads.
- Cyclo-cross bikes: Similar to road bikes, cyclo-cross bikes benefit from thin, grippy tape that can withstand muddy and wet conditions.
When choosing handlebar tape, consider factors such as thickness, material, and texture to find the best option for your riding style and preferences.
Tools and Materials Needed
Essential Tools for Wrapping Handlebars
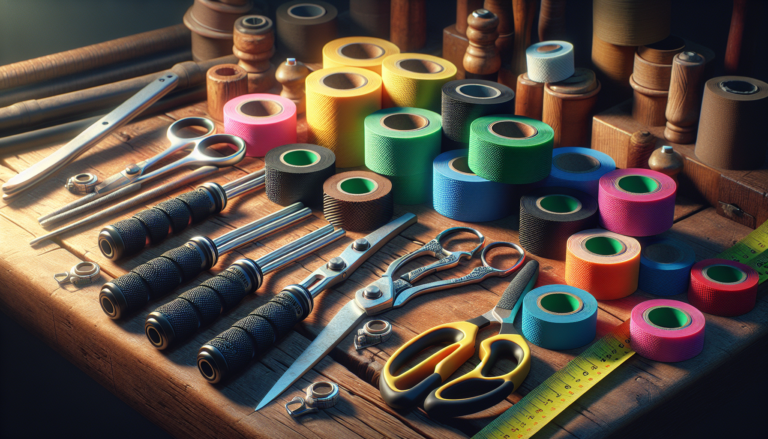
To properly wrap your bike handlebars, you’ll need a few essential tools:
- Scissors: For cutting the handlebar tape to the appropriate length
- Electrical tape: Used to secure the ends of the handlebar tape and create a clean finish
- Hex key: Necessary for removing and reinstalling the bar end plugs
- Pliers (optional): Helpful for stretching and holding the tape in place during wrapping
Having these tools on hand will make the wrapping process much smoother and ensure a professional-looking result.
Choosing the Right Handlebar Tape
When selecting handlebar tape, there are several factors to consider:
- Material: Common materials include cork, synthetic cork, foam, leather, and silicone. Each offers different levels of comfort, grip, and durability.
- Thickness: Thicker tape provides more cushioning but can feel bulky, while thinner tape offers a more direct feel but less vibration dampening.
- Texture: Some tapes have a smooth surface, while others feature perforations or embossing for added grip.
- Color and design: Choose a tape color and design that complements your bike’s aesthetics and personal style.
Experiment with different types of tape to find the one that best suits your needs and preferences. Many cyclists keep a few different rolls on hand to switch things up for different riding conditions or events.
Step-by-Step Guide to Wrapping Bike Handlebars
Preparing Your Bike for Wrapping
Before you begin wrapping your handlebars, it’s essential to properly prepare your bike:
- Remove any old tape and adhesive residue from the handlebars using a solvent or adhesive remover.
- Clean the handlebars thoroughly with rubbing alcohol to ensure a clean, grease-free surface for the new tape to adhere to.
- If your bike has bar end plugs, remove them using a hex key.
- If you’re using a brake lever, make sure it’s positioned correctly on the handlebars before you start wrapping.
Taking the time to properly prepare your bike will ensure that the new tape adheres securely and looks great.
Starting the Wrap: Techniques and Tips
When starting to wrap your handlebars, there are a few key techniques to keep in mind:
- Begin wrapping from the bottom of the handlebar, near the stem.
- Overlap each wrap by about 1/3 to 1/2 of the tape’s width to ensure full coverage and a smooth finish.
- Keep the tape taut as you wrap, but avoid stretching it too much, which can cause it to tear or loosen over time.
- Use electrical tape to secure the end of the handlebar tape before you start wrapping.
As you wrap, take your time and make sure each wrap is straight and even. If you make a mistake, simply unwind the tape and start again.
Wrapping Around the Hoods
One of the trickiest parts of wrapping handlebars is navigating the brake and shifter hoods. Here are some tips for a neat and secure wrap:
- As you approach the hoods, wrap the tape around the back of the hood, making sure it lays flat against the surface.
- Continue wrapping up and over the top of the hood, ensuring that the tape remains taut and even.
- Use your fingers to mold the tape around the contours of the hood for a snug fit.
- Once you’ve wrapped over the top of the hood, continue down the other side, overlapping the tape as before.
Take your time when wrapping around the hoods to ensure a clean, professional look.
Finishing the Wrap: Securing the Tape
Once you’ve wrapped the entire handlebar, it’s time to secure the tape and create a clean finish:
- When you reach the end of the handlebar, wrap the tape around the end a few times, making sure it lays flat and even.
- Use electrical tape to secure the end of the handlebar tape, wrapping it tightly around the end of the bar.
- Trim any excess tape with scissors, creating a neat and clean edge.
- Reinstall the bar end plugs, if applicable, using a hex key.
By taking the time to properly secure and finish the handlebar tape, you’ll ensure that it stays in place and looks great for many rides to come.
Advanced Tips and Tricks
Common Mistakes to Avoid
When wrapping your handlebars, there are a few common mistakes to watch out for:
- Not keeping the tape taut enough, which can result in a loose, sloppy wrap.
- Overlapping the tape too much or too little, leading to an uneven or bulky finish.
- Wrapping in the wrong direction, which can cause the tape to unravel over time.
- Not securing the ends of the tape properly, allowing it to peel off or fray.
By being mindful of these common pitfalls and taking your time during the wrapping process, you can achieve a flawless, professional-looking wrap.
Maintaining Your Handlebar Tape
To keep your handlebar tape looking and functioning its best, it’s important to properly maintain it:
- Clean the tape regularly with a damp cloth to remove dirt, sweat, and grime.
- Avoid using harsh chemicals or abrasive cleaners, which can damage the tape’s surface.
- Inspect the tape periodically for signs of wear, such as fraying or peeling edges.
- If the tape becomes heavily worn or damaged, replace it promptly to maintain a comfortable and secure grip.
By properly maintaining your handlebar tape, you can extend its lifespan and ensure that it continues to provide the comfort and performance you need on every ride.
Conclusion
Recap of Key Points
Wrapping your bike handlebars is an essential skill that every cyclist should master. By choosing the right materials, using proper techniques, and following the step-by-step guide outlined in this article, you can achieve a professional-looking wrap that provides comfort, security, and style on every ride.
Remember to:
- Choose the right handlebar tape for your bike type and riding style
- Properly prepare your bike before wrapping
- Keep the tape taut and overlap it evenly as you wrap
- Take your time when wrapping around the hoods for a clean finish
- Secure the ends of the tape with electrical tape and trim any excess
- Maintain your handlebar tape regularly to extend its lifespan
By following these key points and practicing regularly, you’ll soon become a pro at wrapping your handlebars.
Additional Resources
If you want to learn more about wrapping bike handlebars or explore other aspects of bike maintenance and customization, check out these additional resources:
- Park Tool: Handlebar Tape Installation (Drop Bar)
- GCN Tech: How To Wrap Bar Tape Like A Pro
- Sheldon Brown’s Bicycle Handlebar Tape Primer
- Road.cc: How to wrap your road bike handlebars
With these resources and the information provided in this guide, you’ll be well-equipped to tackle any handlebar wrapping project with confidence and skill.


